Face recognition
Overview
The Cloud Access Control System integrates face recognition modules from HIK Vision and consists of the following components:
- Verification of the face on the browser side
- Face verification on the server side
- Data exchange with the face recognition modules on site
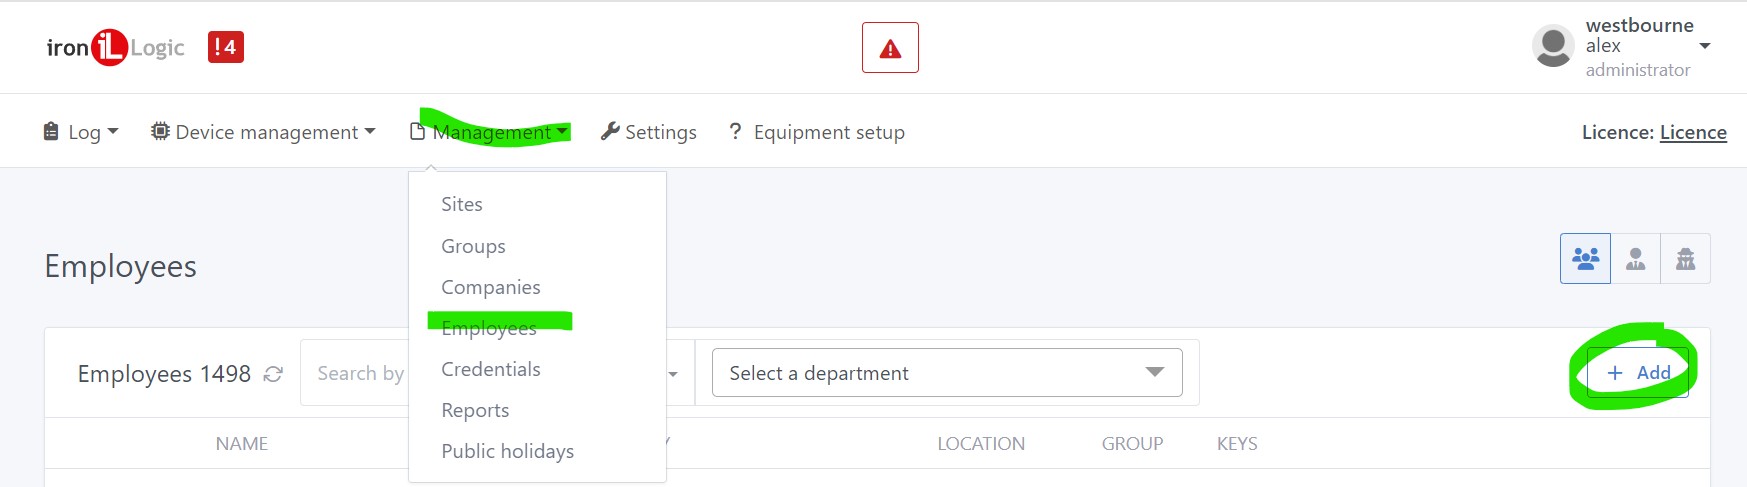
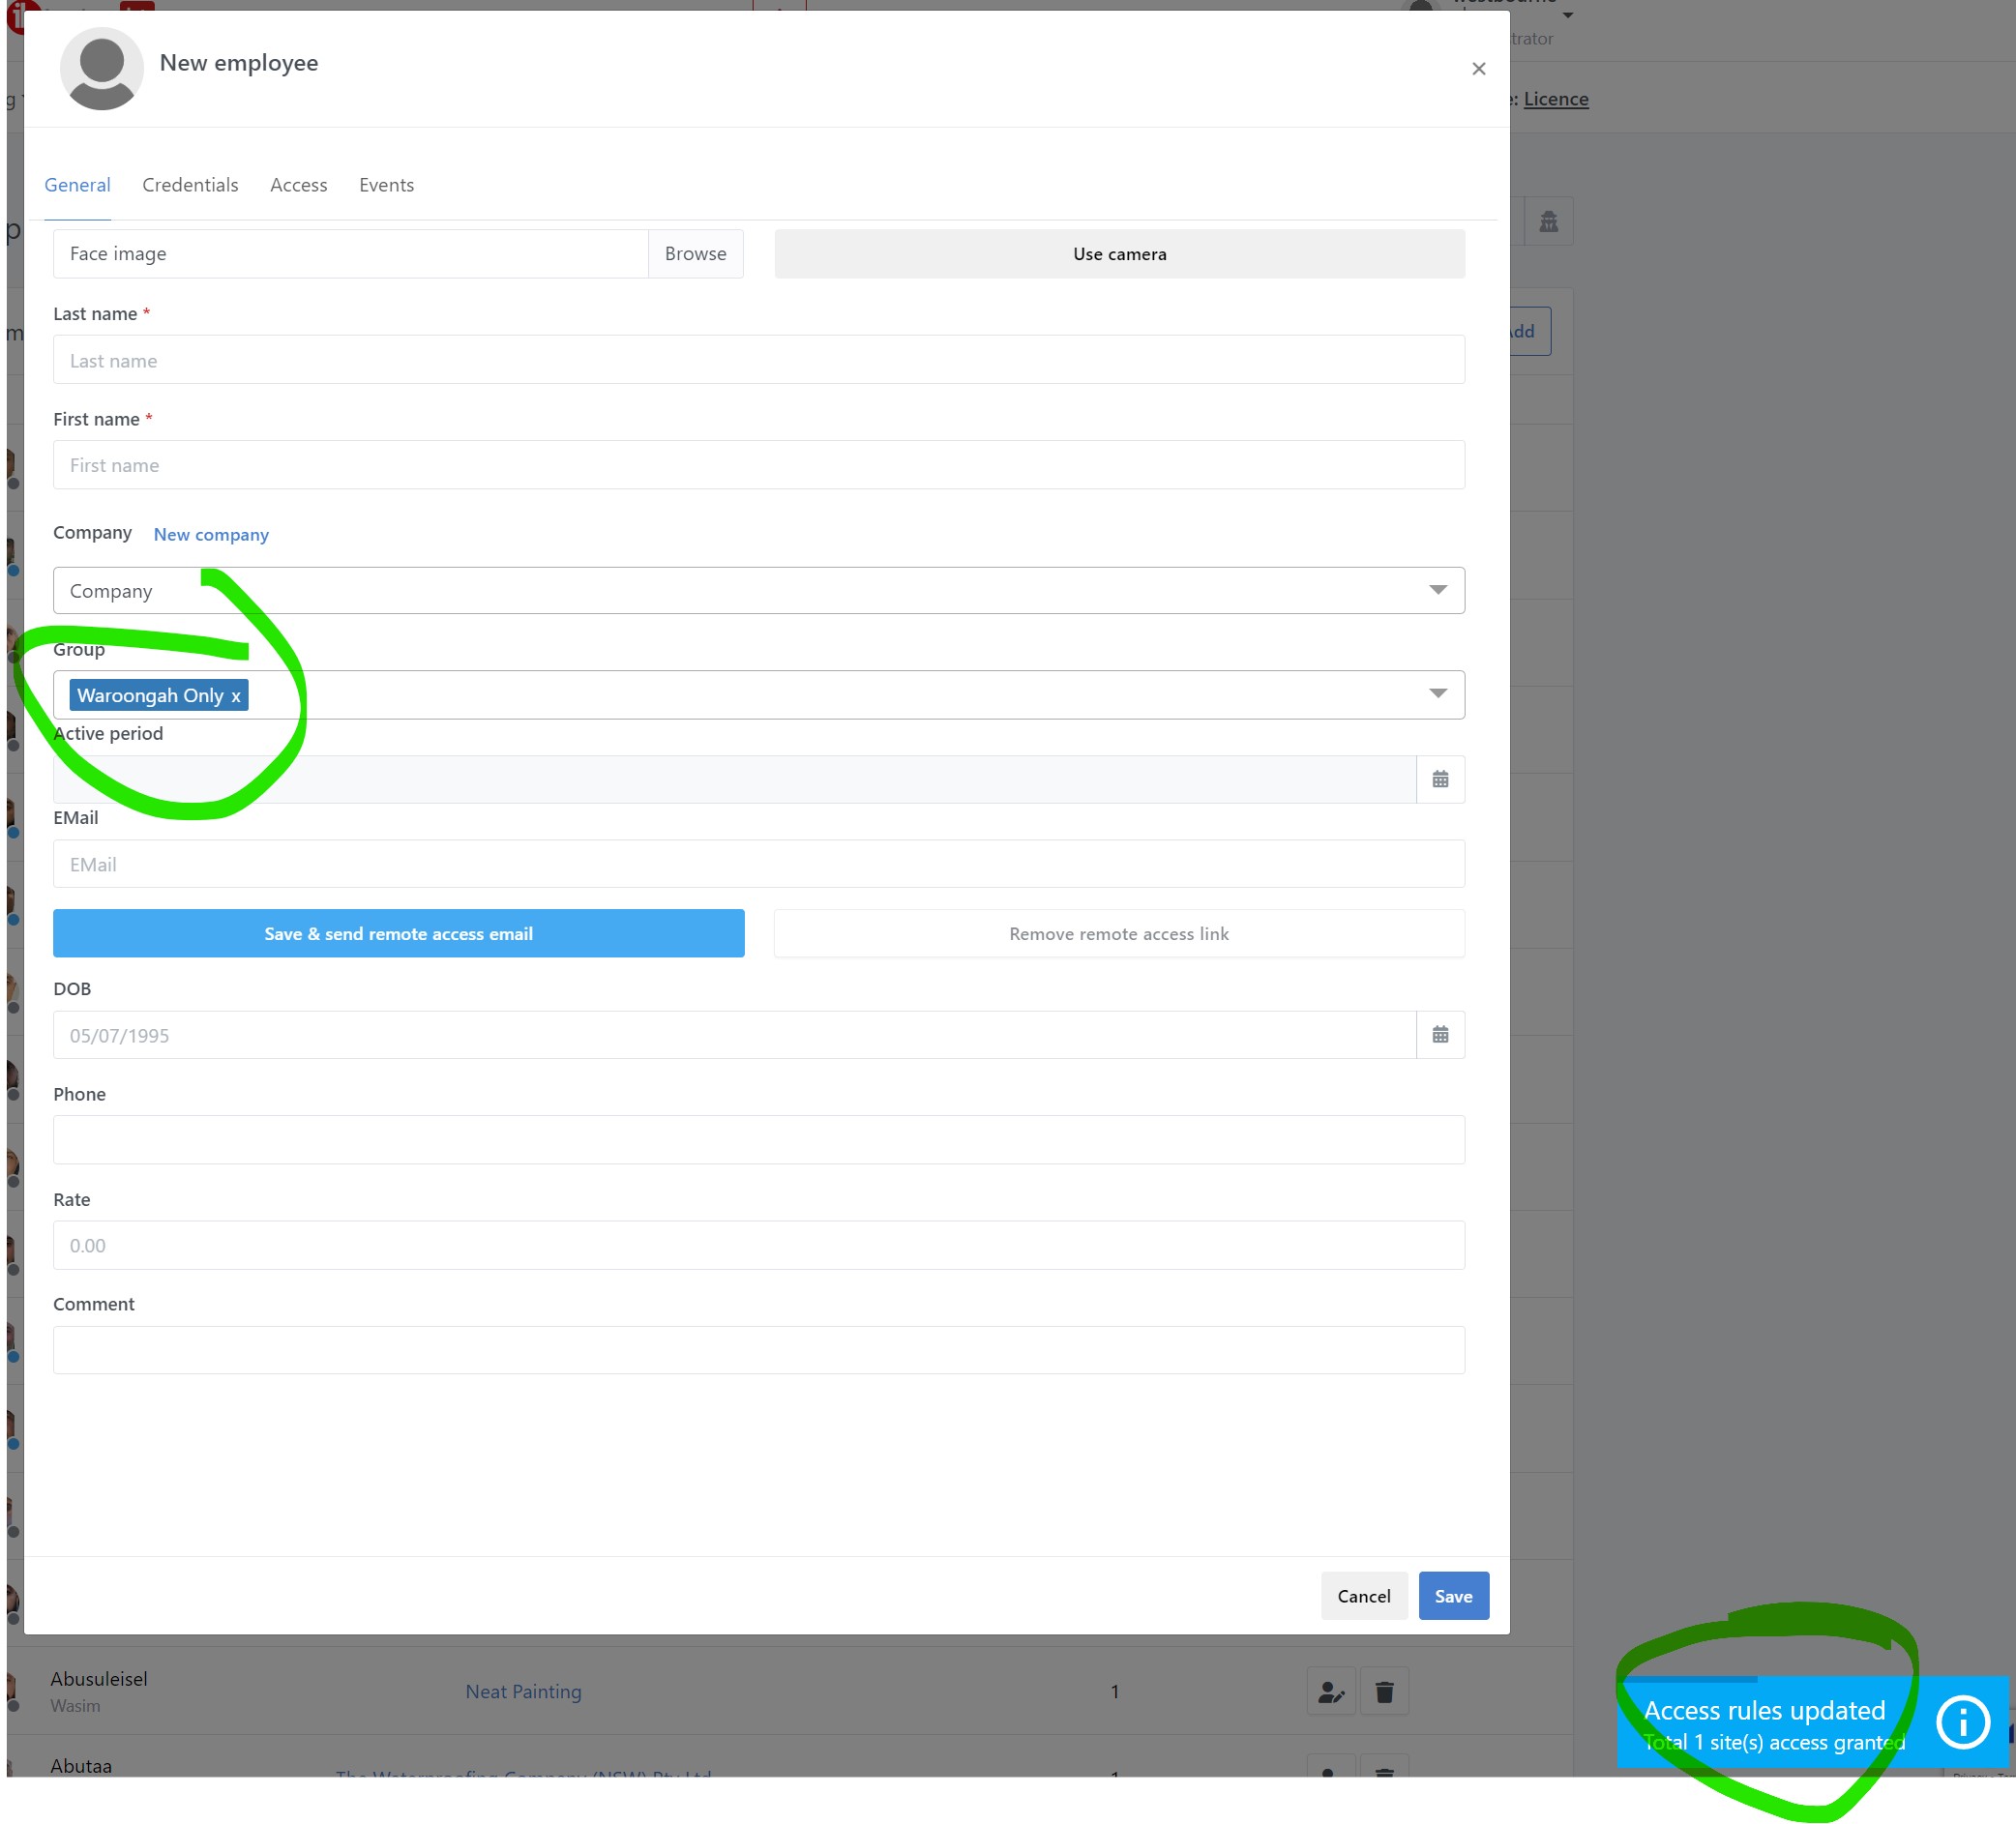
Adding or Changing an Employee
To add an employee, go to Management -> Employees and press the Add button:
If an employee is already registered in the system, search for them using the Search by field. Employees can be searched by first name, last name, company name, or key number, which can be set using the cog dropdown on the right-hand side of the search button.
If an employee is already registered in the system, search for them using the Search by field. Employees can be searched by first name, last name, company name, or key number, which can be set using the cog dropdown on the right-hand side of the search button.
To save a new employee, the following fields must be filled:
- First and Last Name
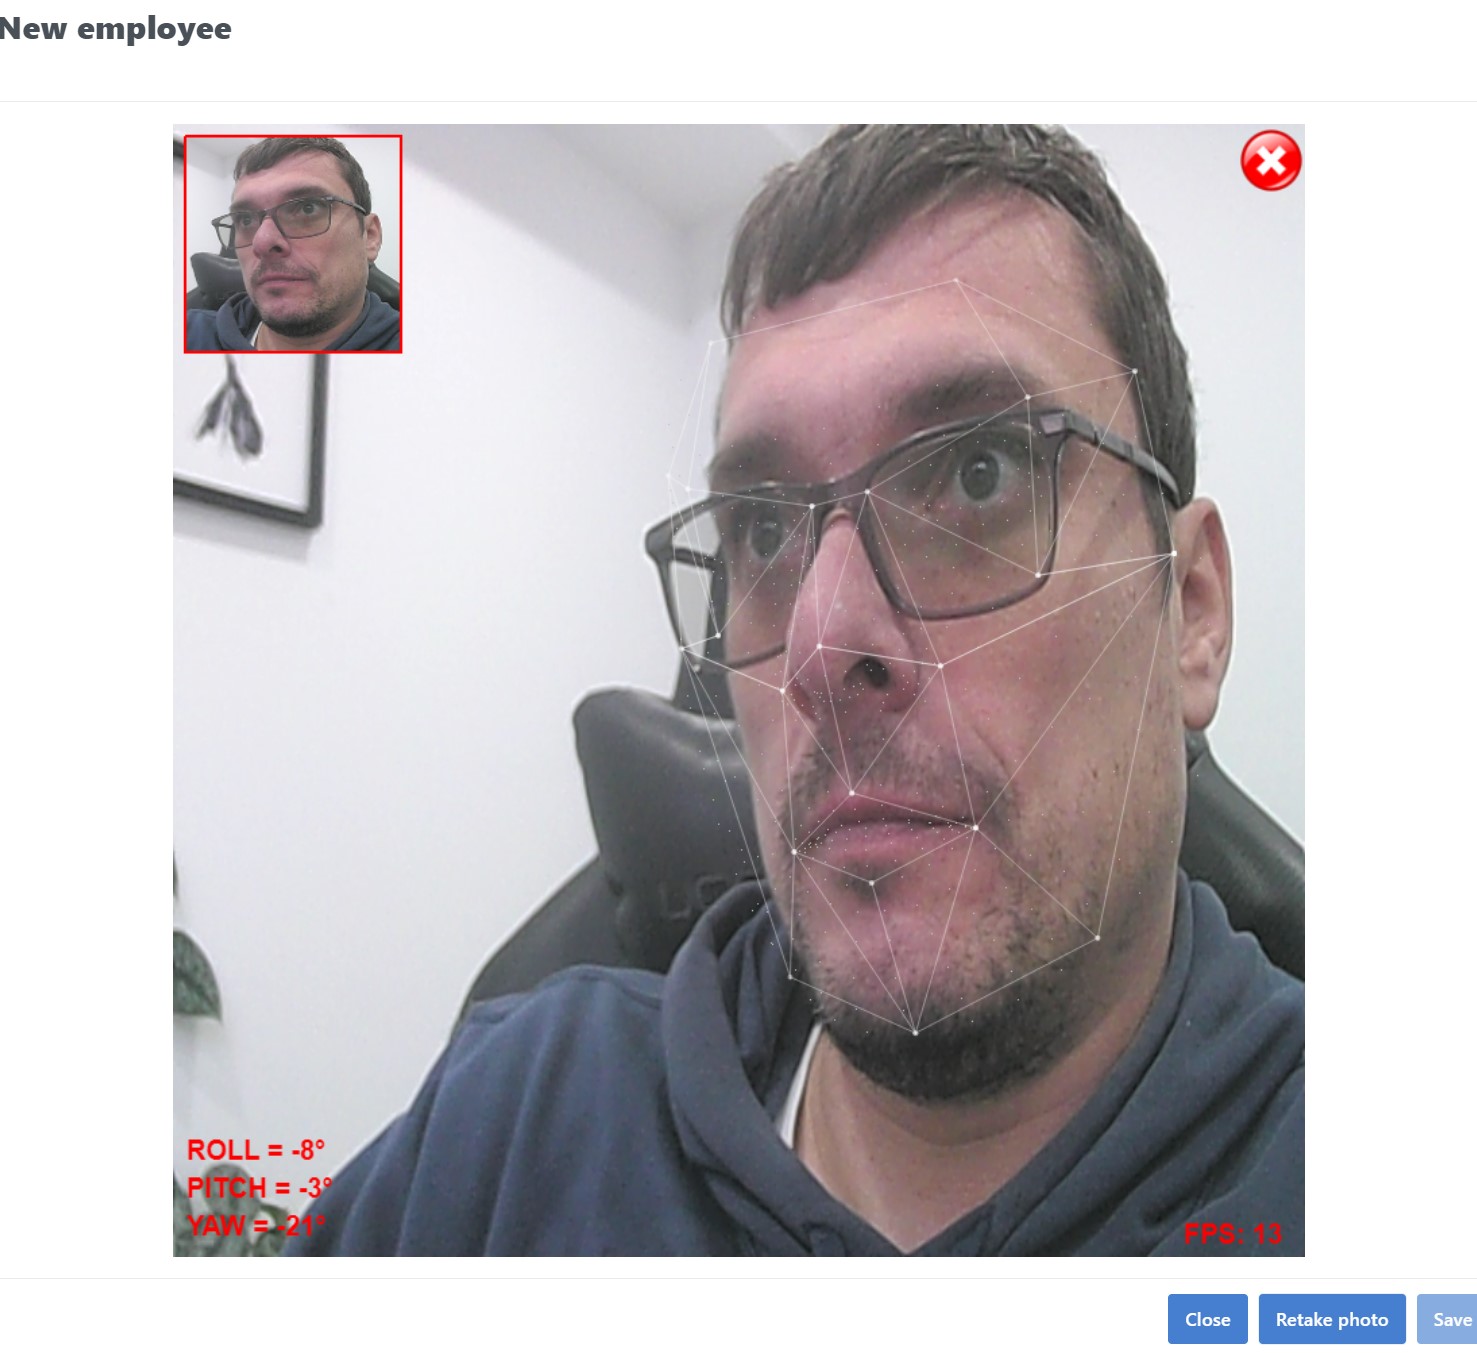
- Face Image: This can be either uploaded or taken with the computer's/smartphone's camera using the Use Camera button on the top right-hand side of the form.
- Credentials: At least one credential must be assigned.
- Access Ruls
Face image
When uploading a face image or using an internal camera, the image must contain only one face, and the face should occupy at least 40% of the image. When using the camera, a live hint is displayed at the bottom left side of the video feed. The face image should match the following criteria:
- Face Orientation: The pitch, rotation, and yaw should not exceed 15°.
- Single Face: Only one face should be present in the image.
- Face Size: The face should occupy at least 40% of the image area. Otherwise, a
MOVE CLOSER TO THE CAMERAerror message will be displayed at the bottom left corner:
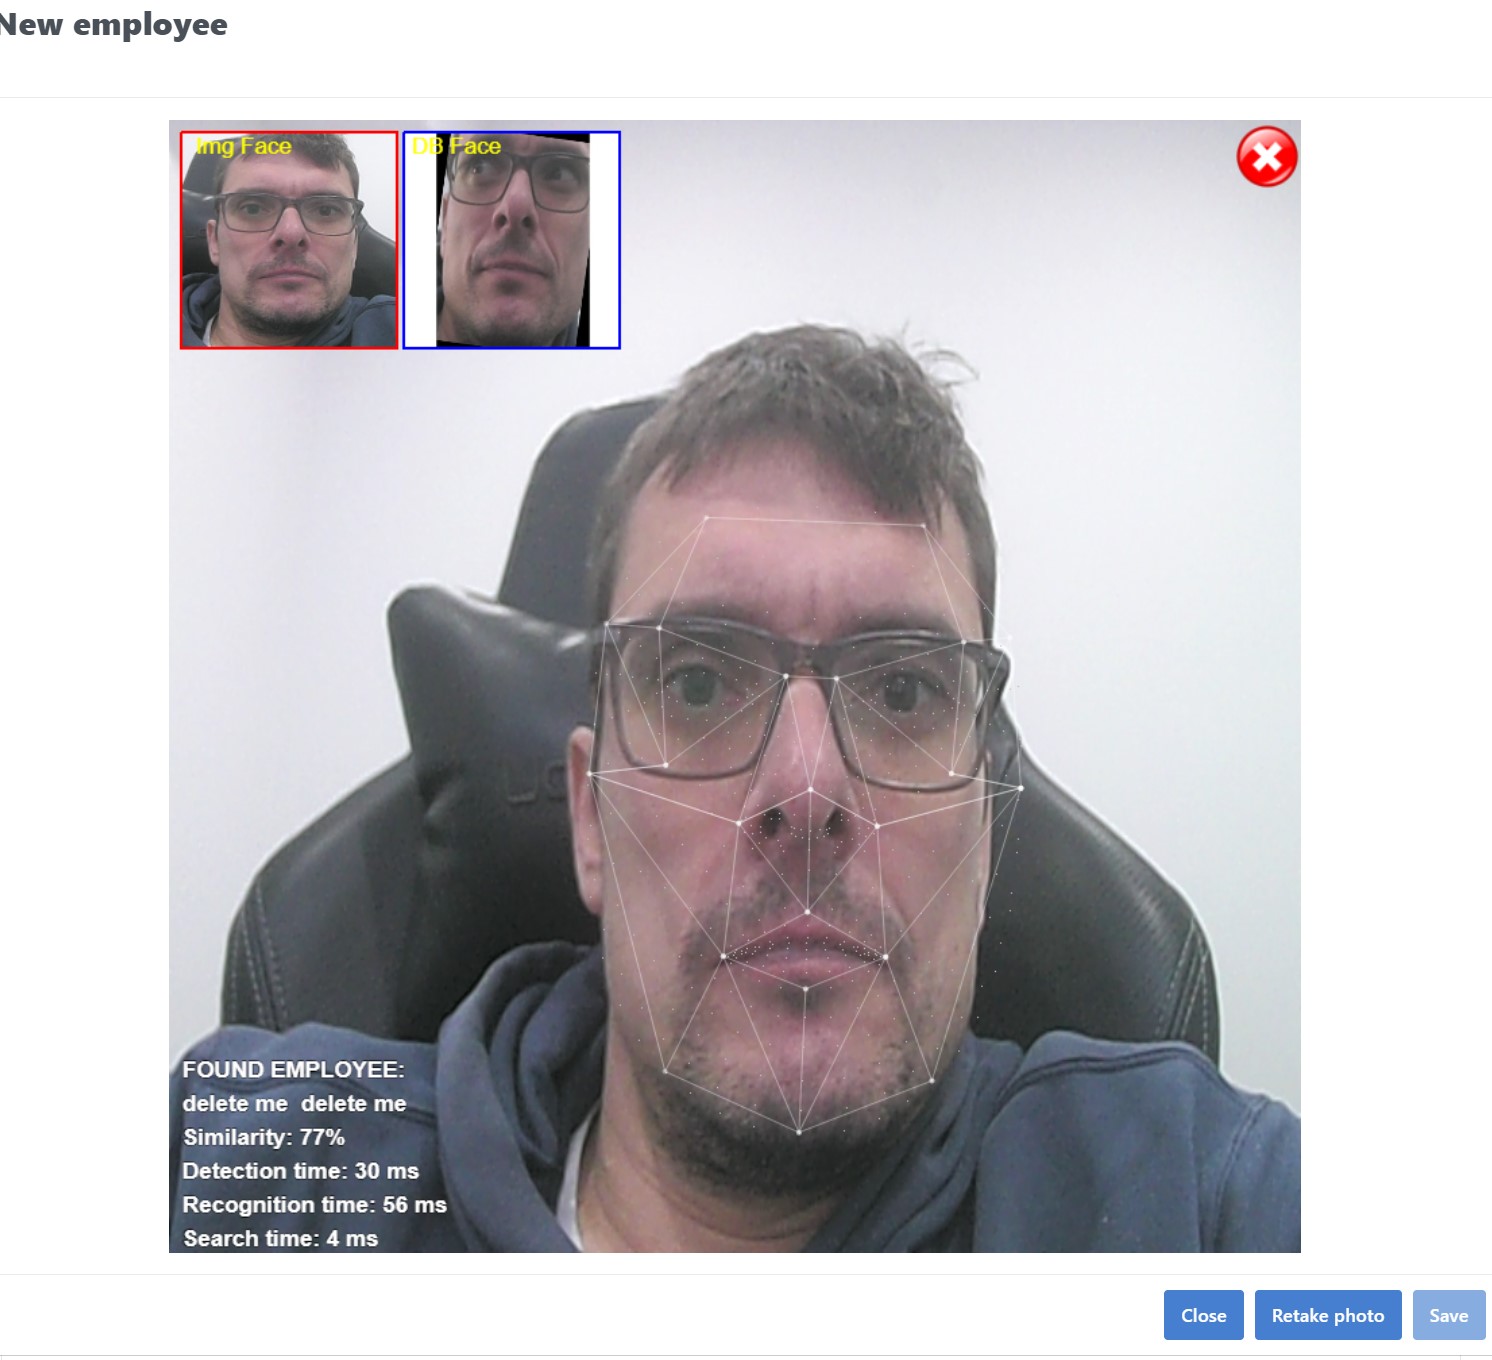
If the face matches all the above criteria, it will be searched in the account's database. If any matches are found, further saving operations will be blocked with the error explanation at the bottom-left side of the image:
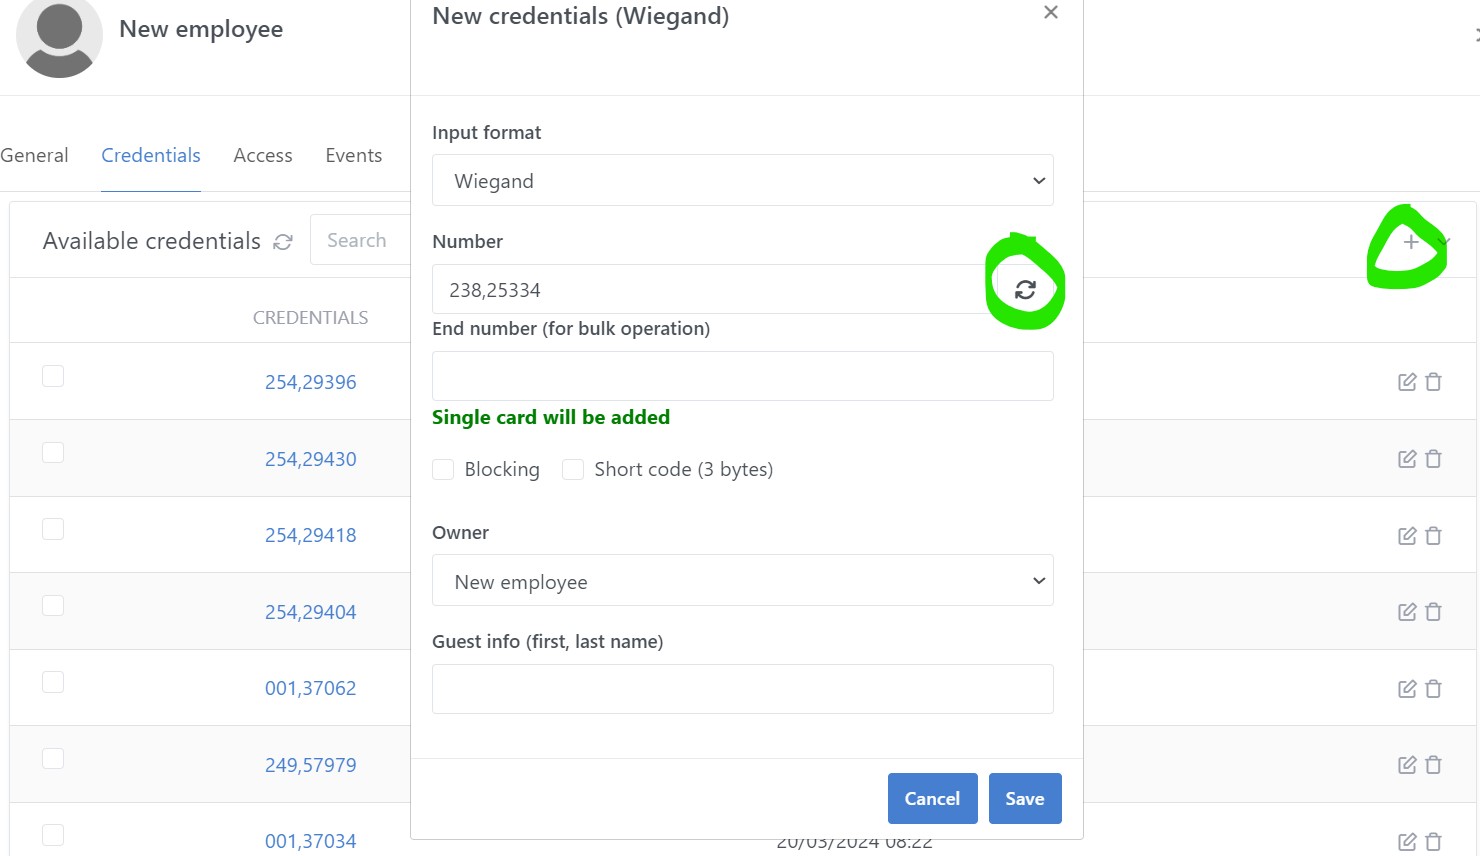
Credentials
At least one credentials required for emplloyee to be assigned. If employee uses RFID key fob and face recognition features, then the keyfob number should be entered manually or scanned with Z2-USB reader. Credentials must be assigned at Credentials tab, then + (Plus) button at the top right side of the form. If only the face recognition features used for employee, then the credentials can be automatically generated by the Refresh button:
Access control rules
The access control rules must be configured in the Access tab. From the list of available sites, select the access control mode for each site or leave it as Never if no access is required.
Access control can be assigned automatically from the Default Group. The groups can be configured in the Management -> Groups menu.
A group is a template with preconfigured site access settings, and the default group can be set in the Settings menu. If a default group is defined, it will be automatically assigned to a new employee when creating a new user, and the access rules from the group will be applied automatically:
Face recognition controller settings
Controller settings for face recognition are available in the controller's information under the 'Face Recognition Settings' tab:

GENERAL SECTION
Enable Authentiction
Enables or disables face recognition and RFID authentication. Disabled option blocks all users/employees for access
Anti-Spoofing Prevents false facial verification using a photo, video, mask, or other substitutes for an authorized person's face. Increasing the anti-spoofing detection level may decrease passing efficiency (real people might be recognized as spoof).
Face Recognition Distance Sets the distance the valid distance between the user and the camera when authenticating.
Yaw and Pitch angles Sets maximum yaw and pitch angles when authenticating.
Face Image Quality Specifies the quality grade requirements for the image/video feed to pass for face detection and recognition. Higher quality requirements result in a lower passing rate, while lower values increase the risk of false positive verifications.
Face recognition interval Defines the duration in seconds between two continuous face recognitions (images taken from the camera video feed) when authenticating.
Face recognition timeout Specifies the timeout in seconds for the face recognition task. If the timeout is exceeded, the controller will prompt for manual entry.
Authentication interval Sets the timeout in seconds for the same person authentication. Once an employee authenticated (access granted) he/she cannot authenticate again in the period of time.
MAIN CAMERA
Settings applied when recognising using the main/daylight camera.
Face matching threshold 1:1 Similarity threshold when authenticating in 1:1 matching mode (RFID key matches with the employees face). A higher value decreases the false positive recognition rate (person recognized as someone else) but increases the false negative recognition rate.
Face matching threshold 1:N Similarity threshold when authenticating in 1:N matching mode (the actual face compares with the faces registered in the local database). A higher value increases false negative recognitions (failed authentication, but the person is registered in the database), while a lower value increases the false positive recognition rate (when a person is recognized as someone else).
Face with mask threshold 1:1 Authenticating a person when wearing a mask in 1:1 mode. To force employees to remove the mask when authenticating either disable the option or set parameter to 100.
Face with mask threshold 1:N Authenticating a person when wearing a mask in 1:N mode. To force employees to remove the mask when authenticating either disable the option or set parameter to 100.
IR CAMERA SETTINGS
The infrared camera for use in low light environment conditions.
IR Mode enabled/disabled
Enables or disables the IR camera. If set to Disabled, the system will use the normal daylight camera under all conditions.
Infrared mode threshold Sets the threshold of illumination/light brightness to switch to the IR camera. Lower values require less light to activate the IR camera.
Face matching threshold 1:1 Sets the similarity threshold for 1:1 matching mode with the IR camera (RFID key matches with the employee's face). A higher value decreases the false positive recognition rate (person recognized as someone else) but increases the false negative recognition rate.
Face matching threshold 1:N Sets the similarity threshold for 1:N matching mode with the IR camera (the face compares with faces registered in the local database). A higher value increases false negative recognitions (failed authentication, but the person is registered), while a lower value increases the false positive recognition rate (person recognized as someone else).